
How Far Apart Should Heavy-Duty Backpack Hooks Be Spaced in Lockers?
Determining how far apart should heavy-duty backpack hooks be spaced in lockers is essential for creating an environment that remains organized and functional. When students or employees crowd their belongings into tight spaces, poor planning often leads to damaged gear and frustration. By calculating the right distance between each hook, you can maximize storage capacity while ensuring that every user has enough room to access their items without interference.
This article examines the precise measurements required to balance density with usability, helping you avoid common pitfalls in locker design and hardware installation.
The Standard Spacing Requirement
If you place hooks closer than 10 inches, you risk overlapping bags, which makes it nearly impossible to remove one without knocking others to the floor. When you provide at least 12 inches of lateral space, you ensure that even wider laptop bags or gym totes have enough room to hang vertically.
If your lockers are narrow, you might be tempted to squeeze more hooks onto a single wall rail. However, doing so usually leads to a “cluttered” locker where users struggle to find their belongings. A 12-inch interval is generally considered the industry standard for commercial locker rooms and school facilities.
By sticking to this measurement, you preserve the structural integrity of the wall surface and prevent the hooks from acting as a bottleneck for daily traffic.
Calculating Capacity Based on Locker Width
For wider units, such as 18-inch or 24-inch lockers, you can comfortably fit two to three hooks. Always leave at least 3 to 4 inches of clearance from the side walls to prevent bags from rubbing against the metal or wood edges.
When planning your layout, treat each hook as the center of a “storage zone.” A 12-inch wide zone ensures that a backpack hanging on one hook does not obscure the contents of the hook next to it.
If you are retrofitting older lockers, use a measuring tape to mark the center points before drilling any holes. This proactive approach prevents the need for patching mistakes later and ensures your hardware is evenly distributed across the back panel.
Comparing Hook Spacing Configurations
The following table provides a quick reference for how many hooks you can fit based on common locker widths, assuming a standard 12-inch center-to-center spacing requirement.
| Locker Width | Max Recommended Hooks | Spacing Strategy |
|---|---|---|
| 12 Inches | 1 Hook | Centered for balance |
| 18 Inches | 2 Hooks | Offset 4 inches from sides |
| 24 Inches | 2-3 Hooks | Evenly distributed |
| 36 Inches | 3-4 Hooks | Grouped in pairs |
Vertical Placement and Hook Height
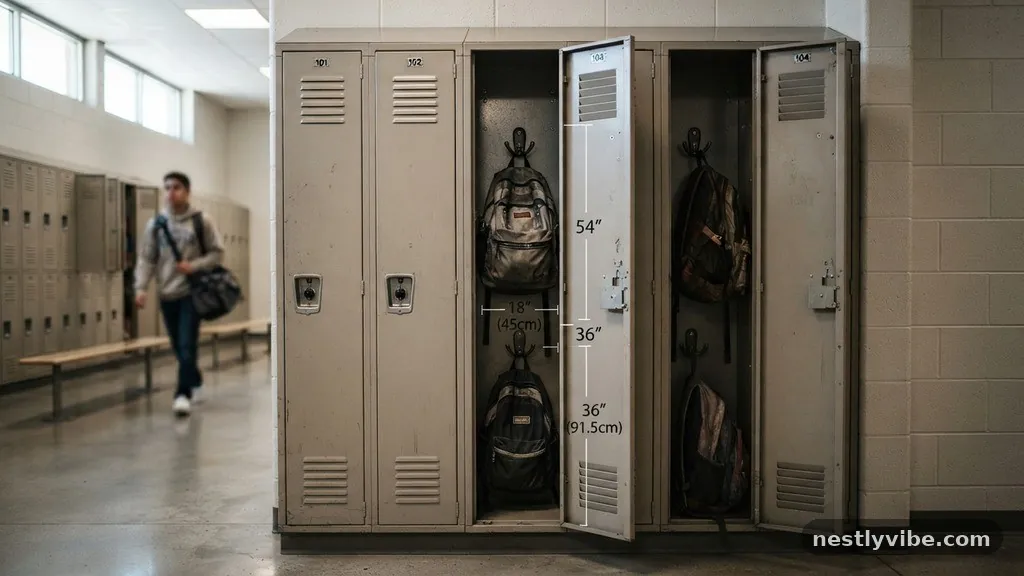
Spacing isn’t just about the horizontal gap; the height at which you mount the hooks is equally critical for functionality. For most adult or high school settings, you should mount your heavy-duty hooks at approximately 60 inches from the floor. This height keeps the bottom of the backpack off the locker floor, which prevents dirt buildup and makes cleaning much easier. If the lockers are intended for younger children, consider lowering this to 48 inches to ensure accessibility.
When you install hooks at the correct height, you also prevent the “drag” that occurs when a bag is too long for the space. If the bag sits on the floor, the weight is no longer supported by the hook alone, which might seem helpful but actually encourages users to shove bags into corners. Proper vertical alignment forces the weight of the bag to hang clear of the base, putting less strain on the hook’s mounting hardware.
Always check the manufacturer’s specifications for the specific ANSI/BIFMA furniture standards regarding load-bearing equipment to ensure your installation remains safe over time.
Material Selection for Heavy-Duty Use
The weight of a modern backpack, often loaded with laptops, textbooks, and water bottles, can exceed 20 pounds. Because of this, you should prioritize steel or heavy-duty cast aluminum hooks over plastic or thin wire alternatives.
If you space your hooks correctly but use weak materials, the hooks will eventually bend or pull out of the mounting surface. Look for hooks that feature a wide mounting plate with at least two or three screw holes to distribute the load across a larger area of the wall.
Avoid decorative or single-screw hooks, as these often fail under the consistent torque applied by heavy bags. A double-pronged hook can be a great choice because it provides two hanging points for one backpack—one for the handle and one for the strap—effectively doubling the stability. When installing these, ensure your screws are long enough to penetrate the backing material, whether it is sheet metal, wood, or reinforced plastic.
Managing Multiple Users in Shared Lockers
This requires a more generous approach to spacing to ensure that one person’s coat doesn’t get tangled with another’s backpack. If you are dealing with a “hot-desking” scenario, increase your spacing to 15 inches between centers. This extra room makes it much easier for users to quickly identify and retrieve their specific items without shifting the entire contents of the locker.
Consider using color-coded hooks or small labels above each position to designate individual space. This helps maintain a sense of order and reduces the likelihood of bags being tossed haphazardly into the middle of the unit. When users have a defined “territory” for their belongings, they are far more likely to hang their items properly rather than piling them on the floor.
Structural Considerations for Installation 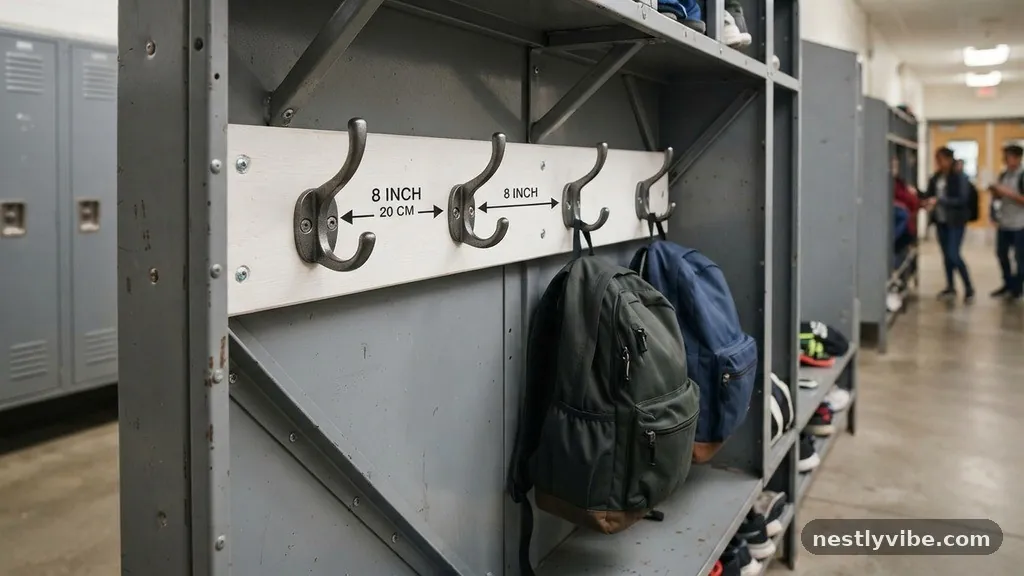
Before you begin drilling, verify what is behind the locker wall.
If you are working with thin-gauge sheet metal, the metal itself might flex under the weight of a heavy backpack, even if the hook is rated for high capacity. In these cases, you may need a backing plate or a piece of plywood on the outside of the locker wall to provide a rigid anchor point. This ensures that the screws don’t wiggle loose over time, which is the most common cause of hook failure.
If you are mounting to a wall rail rather than the back of the locker, ensure the rail itself is bolted securely to the studs. A rail allows for more flexible spacing, as you can slide the hooks along the track to adjust for changing needs. This modularity is a significant advantage in schools where the size of student backpacks might change from year to year.
The Role of Depth in Hook Functionality
The depth of your locker significantly influences how you should space your hooks.
A shallow locker (under 12 inches deep) requires that hooks be placed carefully so that large backpacks don’t prevent the locker door from closing. If your lockers are shallow, you might consider using offset hooks or mounting them at a slight angle. This allows the bag to hang in a way that minimizes the “profile” of the item, ensuring the door shuts without pressure.
Conversely, deep lockers allow for more creative arrangements, such as placing hooks on the side walls rather than just the back. By utilizing the side walls, you can increase the effective distance between hanging items, even if the locker width is limited. Always test the door clearance with a fully packed bag before finalizing your hook placement, as a bag that is too bulky will inevitably lead to bent locker doors.
Common Mistakes to Avoid
Many people forget that a backpack isn’t a static rectangle; it has straps that stick out and catch on nearby items. When you plan your spacing, imagine the bags are at least 2 inches wider than they actually are to account for these snag points. If you ignore this, users will constantly struggle with tangles, leading to damaged straps and frustrated users.
Another mistake is placing hooks too close to the top shelf. If a hook is placed directly under a shelf, you won’t be able to lift the backpack handle over the hook. Ensure there is at least 4 to 6 inches of vertical clearance between the top of the hook and the underside of any shelf or horizontal obstruction.
This “headroom” is vital for the ergonomic movement required to lift and maneuver heavy gear.
Maintaining Order with Proper Hardware
Once you have established the right spacing, maintenance becomes much simpler. Regularly inspect your hooks for loose screws or signs of fatigue in the metal.
If you notice a hook starting to lean or pull away from the wall, tighten the hardware immediately before the hole becomes stripped. Over time, the constant impact of heavy bags hitting the hooks can cause vibrations that loosen even the tightest bolts, so include a quick check in your seasonal facility maintenance routine.
Encourage users to use both straps of their backpack when hanging it, as this balances the weight and prevents the bag from twisting. If you have the budget, consider adding a small “catch” or a rubberized coating to the hooks to prevent items from sliding off. These small additions can significantly extend the lifespan of your locker equipment and keep the space looking professional.
Frequently Asked Questions How do I measure the center point for hook spacing?
To measure the center point, use a ruler to find the exact middle of your locker width.
From that point, measure outward to the left and right to mark the centers for your hooks. Always use a level to ensure your marks are perfectly horizontal, as even a slight slant will cause items to migrate toward one side of the locker.
Can I install hooks on the door of the locker?
While it is possible to install hooks on the inside of a locker door, it is generally discouraged for heavy-duty use. The constant movement of the door can cause the hooks to rattle or loosen, and the weight of a heavy bag can stress the door hinges over time.
It is almost always better to mount hooks on the fixed rear or side walls of the locker.
What is the best type of screw for locker hooks?
For metal lockers, you should use machine screws with a nut and washer on the back side for maximum security. If you are drilling into wood or composite, use heavy-duty wood screws that are long enough to bite deep into the panel. Always avoid using adhesive-backed hooks for anything heavier than a light coat, as they will fail under the weight of a typical backpack.
How much weight should a heavy-duty hook support?
A high-quality, heavy-duty hook should be rated to support at least 30 to 50 pounds.
This accounts for the static weight of the bag plus the dynamic force exerted when a user throws their bag onto the hook. Always check the packaging or the manufacturer’s technical data sheet to confirm the weight rating of your specific hardware.
Why do my bags keep falling off the hooks?
Bags usually fall off because the hook depth is too shallow or the angle of the hook is insufficient. If you have shallow hooks, replace them with a deeper “J” or “U” shaped hook that cradles the strap more effectively.
Additionally, ensure the hook is mounted at a height where the user doesn’t have to struggle to get the strap over the tip.
Summary and Best Practices
Achieving the right configuration for your storage area depends on careful planning and an understanding of how users interact with their gear. By keeping the center-to-center distance at 12 inches or more, you ensure that bags remain accessible and protected from unnecessary wear. Remember that how far apart should heavy-duty backpack hooks be spaced in lockers is ultimately a question of balancing your available width with the need for individual space.
Start by measuring your interior dimensions and selecting hardware that matches the weight of the items being stored. Avoid the urge to overstuff the space, as a well-spaced locker system will last longer and provide a much better experience for everyone. If you take the time to install your hooks with precision and use the right materials, you will create a functional, durable, and organized storage environment that stands the test of time.