
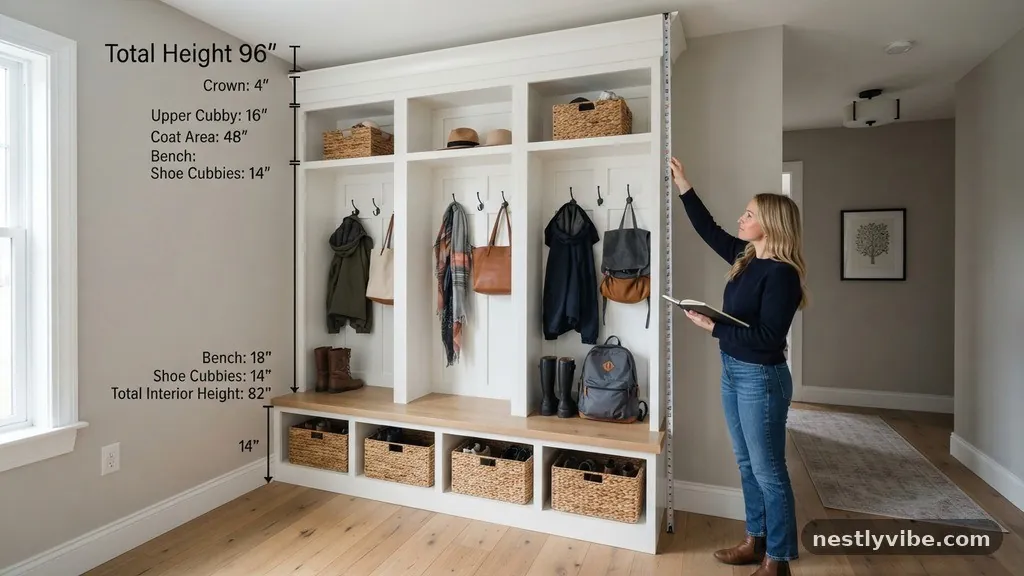
Total Finished Height for Mudroom Locker Systems with 8-Foot Ceilings
Determining the total finished height for mudroom locker systems with 8-foot ceilings requires balancing aesthetic proportions with functional storage needs. Most homeowners aim for a height that maximizes vertical storage while maintaining enough clearance for crown molding or header trim. When you have exactly 96 inches of vertical room, you must account for the bench, the locker opening, and the overhead storage sections.
Achieving the right look often involves a trade-off between floor-to-ceiling integration and standard cabinet heights. This article explores the specific measurements and design considerations necessary to build a mudroom that feels custom-fitted to your home’s architecture.
Determining the Ideal Vertical Dimension
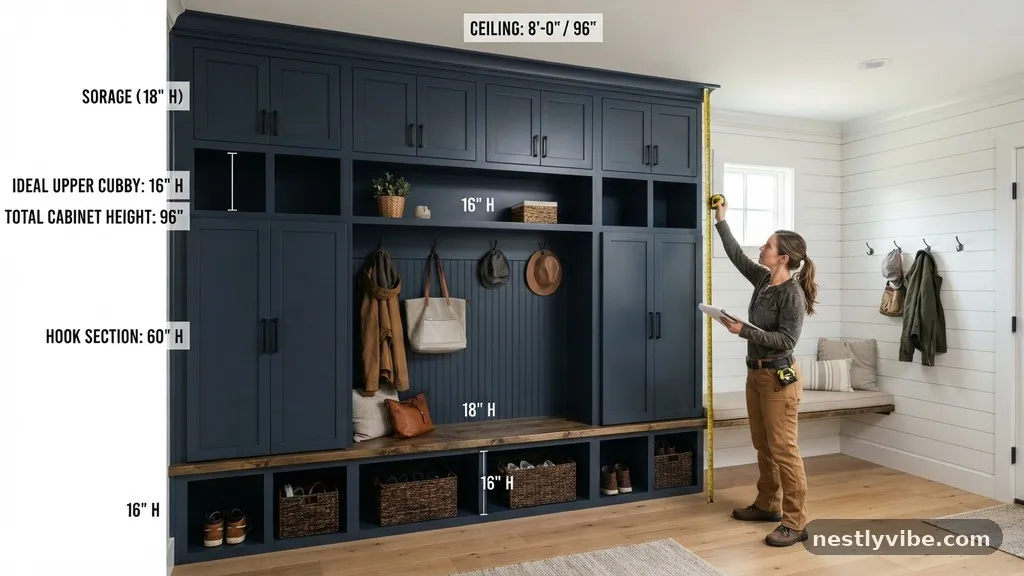
For an 8-foot ceiling, the most common total finished height for mudroom locker systems is 96 inches. This height allows the cabinetry to hit the ceiling line perfectly, creating a built-in, custom look. If you choose to stop the cabinets short, you typically aim for an 84-inch or 90-inch height to leave room for decorative trim.
Stopping at 96 inches requires careful planning regarding your floor level and ceiling flatness. Most residential ceilings are not perfectly level, so you should measure the height at both ends of your intended wall.
If your ceiling dips even slightly, a 96-inch unit might not fit during installation without scribing the top. Scribing involves cutting the top filler or crown molding to match the uneven contour of the drywall. You should always aim for a slightly shorter cabinet frame if you plan to add a thick crown molding piece at the top.
A frame height of 92 to 94 inches provides a two-inch buffer for adjustments. This approach ensures that the finished transition to the ceiling appears seamless and professional.
Standard Bench Height Considerations
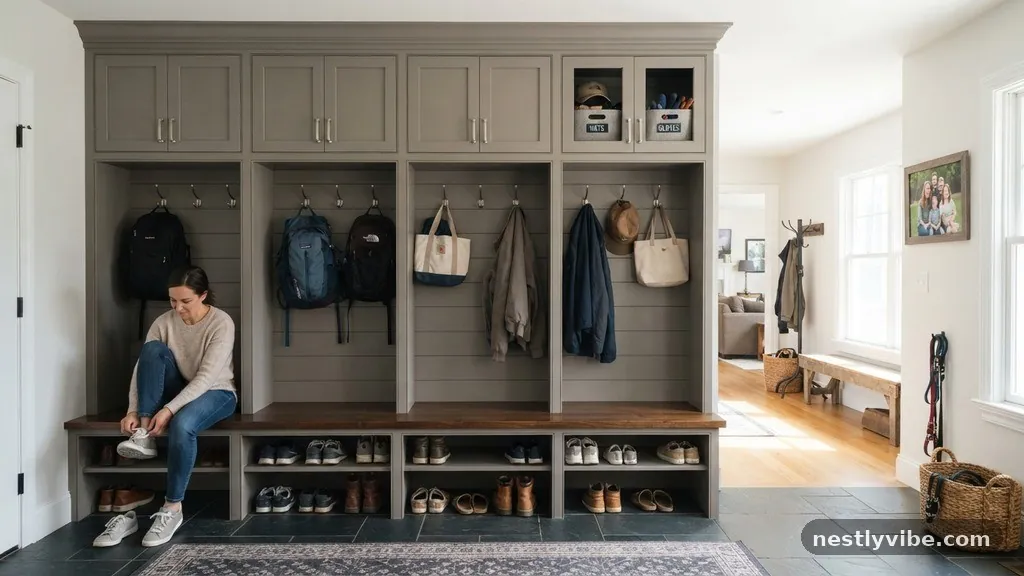
The bench is the foundation of your mudroom locker system and dictates the comfort of the entire unit. A standard, ergonomic bench height sits between 18 and 20 inches from the finished floor. This measurement includes the thickness of the bench top material, such as wood or stone.
If you have children, you might prefer a lower bench, but 18 inches remains the industry standard for adults. Setting the bench at this height leaves roughly 76 to 78 inches of vertical space above the seat.
This remaining space must be divided between the main locker opening and any upper storage compartments. If you are adding a header board for coat hooks, position it approximately 60 to 64 inches above the floor. This provides enough clearance for long winter coats or heavy jackets to hang without dragging on the bench.
You should also consider the depth of your bench, which typically ranges from 16 to 18 inches. A deeper bench allows for more storage baskets underneath but consumes more of your floor space.
Managing Vertical Space Distribution
Once you lock in the total finished height for mudroom locker systems with 8-foot ceilings, you must allocate the remaining vertical inches efficiently. Most designs feature a lower cubby for shoes, a bench for sitting, an open area for coats, and an upper cabinet for seasonal items.
You can divide the 78 inches of space above the bench into two or three distinct zones. A common configuration involves a 48-inch tall main locker opening and a 24-inch tall upper cabinet.
This leaves roughly 6 inches for the horizontal support shelf between the locker and the upper door. If you prefer open lockers without doors, you can eliminate the upper shelf and extend the coat area to the full height. However, adding doors to the top section creates a cleaner, more organized aesthetic.
You can find detailed design principles for home storage that emphasize the importance of these vertical proportions. Always verify that your chosen door hinges will not hit the ceiling crown when opened fully.
The Role of Crown Molding and Trim
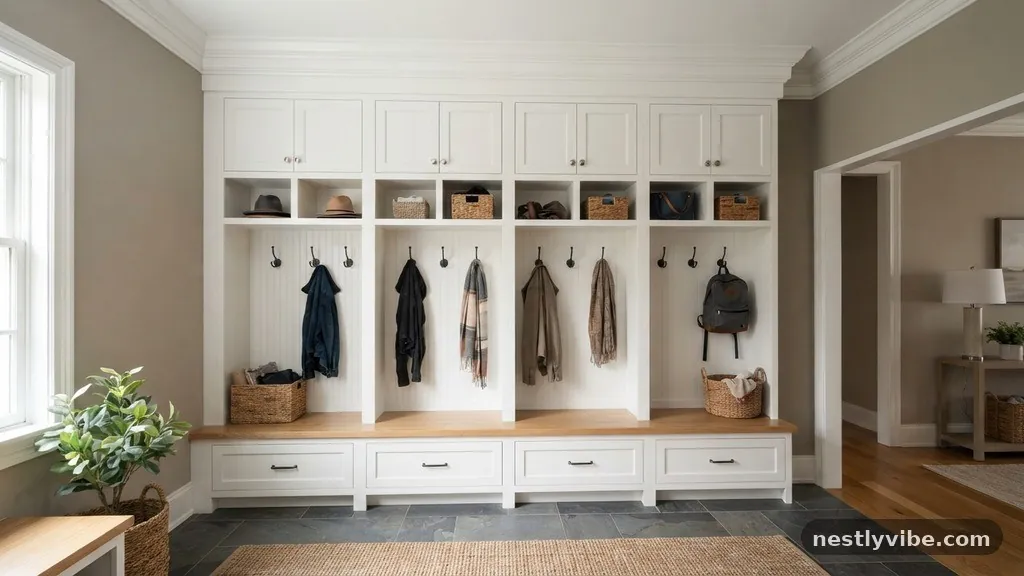
Crown molding is the final piece of the puzzle for a built-in appearance. It covers the gap between the cabinet top and the ceiling, masking any imperfections in the wall surface.
For a 96-inch total finished height, you should choose a crown molding profile that matches the style of your home. A simple shaker-style or flat-stock trim works best for modern homes, while traditional homes may benefit from a more ornate profile.
You must account for the height of the crown molding when calculating your box dimensions. If your molding is 3 inches tall, your cabinet box should be no taller than 93 inches. Failing to subtract the trim height will result in a unit that is too tall to fit.
You should also consider the thickness of the baseboard trim. Running the baseboard around the front of the bench creates a cohesive, integrated look that connects the unit to the existing room architecture.
Comparing Storage Layout Configurations
Different layouts serve different organizational needs, and the total height dictates how much you can fit. Some homeowners prefer a high-density storage approach, while others prioritize open space for accessibility. The table below compares common vertical distributions for a 96-inch tall mudroom wall.
| Section | Standard Height | Function |
|---|---|---|
| Base/Kick | 4 inches | Structural support/Trim |
| Bench | 18 inches | Seating/Shoe storage |
| Main Locker | 50 inches | Coat hanging/Hooks |
| Upper Cabinet | 24 inches | Seasonal storage |
Each of these segments is customizable based on your specific storage requirements. For instance, if you require more room for boots, you can reduce the height of the main locker area by 2 inches.
This adjustment gives you extra space for a taller shoe cubby under the bench. Always prioritize the functions you use most frequently when setting these internal dimensions.
Material Thickness and Structural Integrity
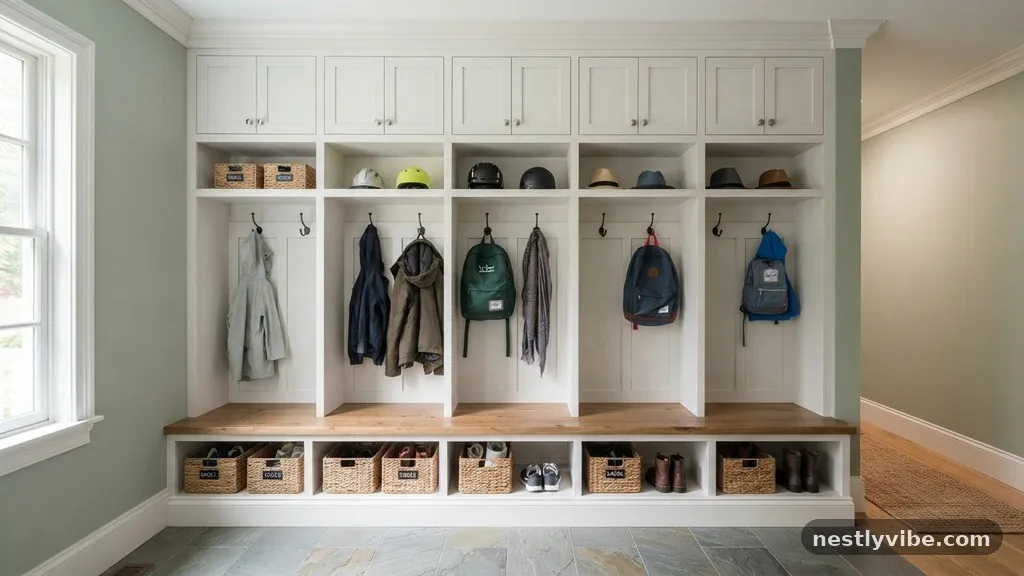
The materials you choose significantly affect your final height calculations. Using 3/4-inch plywood for the carcass is standard, but you must account for every layer.
If you have a top shelf, a bottom shelf, and a bench top, you are looking at 2.25 inches of material thickness just for the horizontal surfaces. These dimensions add up quickly and can throw off your alignment if not tracked during the planning phase.
Always use high-quality, stable materials to prevent sagging over time, especially in the long span of a bench. If you use a countertop material like butcher block or stone, ensure you account for its specific thickness. A 1.5-inch thick butcher block bench requires you to lower your cabinet frame by that exact amount.
You should also consider the weight of the doors and the hardware. Heavy, high-quality hinges are essential for keeping large upper doors aligned over years of daily use.
Incorporating Hooks and Hardware
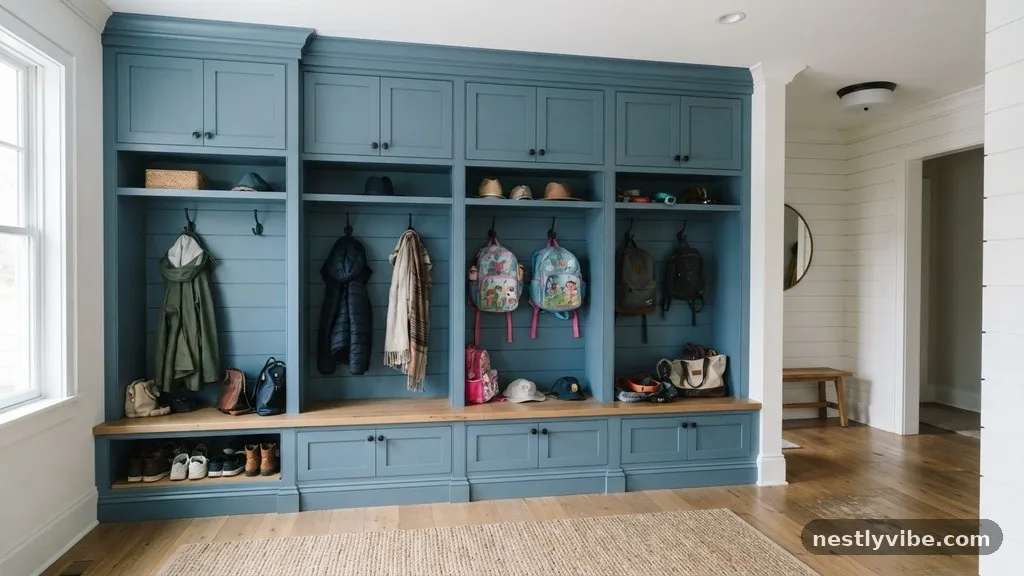
The placement of hooks is a critical detail in mudroom design. Hooks should be positioned to allow coats to hang without touching the bench surface.
A height of 60 inches from the floor is usually the sweet spot for a mix of adult and child users. You can install a row of hooks on a backer board, which also adds a layer of protection to the wall behind the coats.
Consider the “swing space” required for your doors if you choose to include them. If you have limited width, consider sliding doors for the upper section to save room. For the main locker area, open shelving with hooks is often more practical for daily use.
Do not forget to account for the width of the hooks themselves, as they can protrude several inches. This projection can interfere with doors if the locker is too shallow.
Ventilation and Moisture Management
Mudrooms often handle wet gear, making ventilation a key design consideration. If your locker system has doors, you might consider louvered panels or decorative cutouts to allow airflow.
This prevents musty odors from building up inside the cabinets during wet seasons. You should also choose moisture-resistant materials for the base of the unit.
Using PVC trim or a waterproof finish on the bottom kickplate protects the wood from damp shoes and melting snow. If you install a bench top, ensure the material is sealed properly to resist water damage.
A high-quality polyurethane or epoxy finish is recommended for high-traffic areas. These small details ensure your mudroom looks as good in five years as it does on day one.
DIY Versus Professional Installation
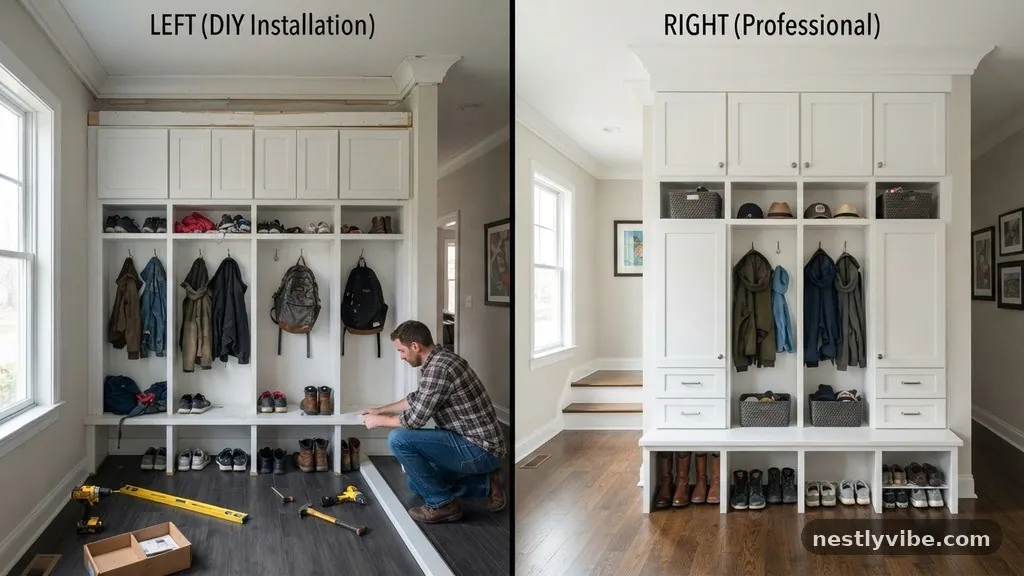
Deciding between a DIY project and a custom professional installation changes your approach to the total height. Professionals often use laser levels to determine the high point of the floor and ceiling before construction begins.
They then build the unit to fit the lowest point, using fillers to bridge the gaps. As a DIYer, you should follow this same practice to avoid frustration during assembly.
If you lack the tools for precise scribing, consider leaving a larger gap at the ceiling and using a wider piece of trim. This “floating” look is more forgiving and can be a deliberate design choice. You can also purchase modular cabinet units and stack them to reach your desired height.
Ensure you anchor any tall unit securely to the wall studs for safety. A 96-inch tall cabinet is top-heavy and poses a tipping risk if not properly fastened.
Frequently Asked Questions
Is it necessary to run the lockers all the way to the ceiling?
Running lockers to the ceiling is a design choice that creates a built-in, polished look while maximizing vertical storage. It also eliminates the need to dust the top of the cabinets. However, stopping short can work if you have crown molding at the ceiling that you want to preserve.
What is the minimum depth for a mudroom locker?
You should aim for at least 16 to 18 inches of depth for a functional locker. This allows enough room for adult-sized coat hangers to fit comfortably. If your space is extremely tight, 14 inches might work, but your coats will likely hang at an angle.
How do I handle an uneven floor when building lockers?
You should measure the floor level across the entire length of the installation. Use a level to find the highest point and base your cabinet height on that measurement. Use shims under the kickplate to raise the lower sides until the entire unit is perfectly level.
Can I use standard kitchen cabinets for mudroom lockers?
Yes, standard kitchen wall or base cabinets can be repurposed for mudrooms. You may need to modify the heights and add custom bench tops to get the look you want. Ensure the wall cabinets are properly supported if you are mounting them above a bench.
What is the best way to finish the edges of the plywood?
Iron-on edge banding is the most common way to cover exposed plywood edges. It provides a clean, professional finish that can be painted or stained to match the rest of the unit. For a more durable finish, you can use solid wood edge strips glued and nailed to the edges.
Maximizing Your Mudroom Potential
Achieving the correct total finished height for mudroom locker systems with 8-foot ceilings transforms a chaotic entryway into a highly functional organizational hub. By targeting 96 inches for a built-in look, you capitalize on the vertical potential of your home while maintaining an accessible and comfortable bench height.
Remember to account for crown molding, floor leveling, and material thickness during your planning phase to avoid installation hurdles. Whether you choose open lockers or enclosed cabinets, the key lies in the precision of your measurements and the quality of your installation.
A well-planned mudroom serves as a buffer zone for your house, keeping dirt and clutter contained near the door. By following these guidelines for layout and height, you create a space that supports your daily routine. Take the time to sketch out your dimensions, verify your wall studs, and select durable materials that can withstand the demands of your household.
When you finish the project, the result will be a permanent, custom-looking feature that adds both value and utility to your home. Start your design today to see how these vertical measurements can improve your daily flow.